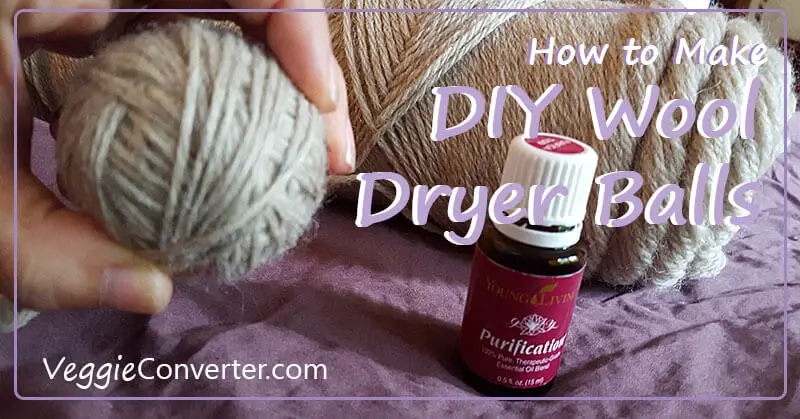
Yeah, I just made a Limp Bizkit reference. What of it? 😉 Rest assured typing out Bizkit hurt me more than it hurt you to get that song in your head after all these years. So, wool dryer balls are awesome. I know this, maybe you know this. But, up until now, I hadn’t made my own. I’ve been happily adding Purification essential oil to these sweet wool dryer balls. I thought to myself, first, why would I need another set? And second, why not just buy them? I mean, I have to buy the yarn anyway, right? It’s not that much more to buy the balls. Huh huh, buy the balls. (Sorry, that made my inner 12-year-old come out.)
And then I GASP lost my dryer balls. I eventually found them inside my empty bookbag that I’d packed inside my suitcase (you know, for all the extra stuff you get on trips). Hah. So I found them in Spokane when I’d been looking for them for days back home in Atlanta. Sigh. I’d washed the bag before heading out of town and, of course, didn’t think to look INSIDE the bag. But that made me realize I needed a second set. And, hey, why not make some for gifts for friends and family while I was at it? So I looked at the price difference again and thought about it a while. It doesn’t really save me a TON to make my own. The skein of wool roving yarn is about $10-11. With each skein you can make about four medium balls or maybe six small ones. These wool dryer balls you can buy already made for about $17 for a set of three. So, savings, yes, but not HUGE.
What I really wanted though, was something sorta Zen to do when I need to shut my brain off a little or I’m hanging out with my little ladies and need something to do with my hands. Making wool dryer balls is totally it. It’s like knitting that you can’t screw up! (And believe me, the two times I tried to knit, I found plenty of ways to screw up…a lot!) I absolutely love make them. Your hands do get a little tired (or at least mine do) and they take a while. But if you have the time, or want to make the time, I totally recommend it. I make them while I’m watching TV or listening to audio books and training videos, too.
So, how do you do it you ask? Easy peasy. The only real requirements are that you use 100% wool yarn, get yourself a pair of pantyhose that you don’t care about and have access to a washer and dryer. Not so bad, right?
How to Make Wool Dryer Balls
Makes about 3 tennis ball size dryer balls
- Start at the end of a skein of 100% wool yarn. I prefer wool roving yarn, but as long as it’s 100% wool, you’re cool. They have Fisherman’s Wool yarn in a lot of fabric shops and it’s 100% wool, but it’s pretty tightly wound, so it takes a little longer to create your ball. Works great, though!
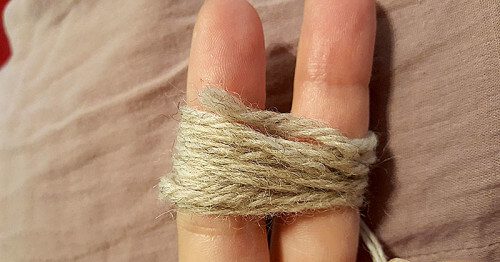
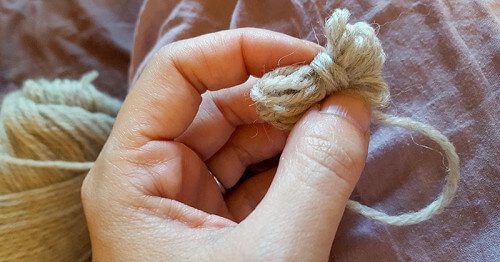
- Place the end between your forefinger and middle finger. Pull your two fingers a bit apart and wrap the yarn loosely around 10 times.
- Pull that loop off your fingers while pinching in the middle to keep it together.
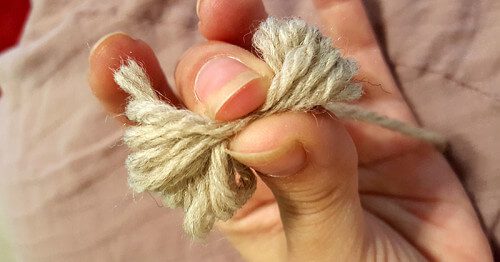
- Start spooling the yarn around that loop right next to your finger. Keep spooling it around, tightly now, and start shifting your direction to go around in a clockwise pattern to make a sphere.
- Once you’ve gotten the size you want (a little larger than a golfball is actually fine, but the larger variety—tennis or softball—will dry your clothes more quickly and efficiently), stop rolling and cut the yarn with an inch or so to spare.
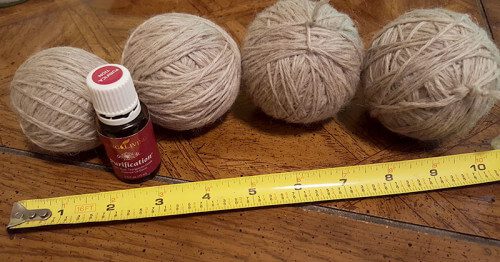
- Use some sort of skinny implement like a knitting needle. (I used the little key tool for the interior doors of the house instead.) Shove the end of the yarn underneath a few layers of the dryer ball. Strangely, I also discovered a cuticle pusher works really well.
- Repeat until you have 3 (or 6 if you get yourself 2 skeins) dryer balls.
- Place the balls in the leg of an old pair of pantyhose. Use ACRYLIC yarn or some other string to tie the pantyhouse tightly next to the sides of each dryer ball. DO NOT USE THE WOOL YARN for the ties. It will felt to the pantyhose if you do.
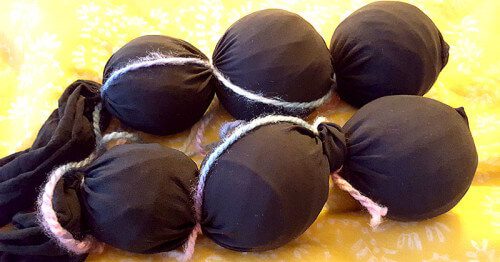
- Plunk the whole caterpillar of dryer ball goodness into your washing machine on HOT WASH and COLD RINSE (if your dryer doesn’t have a rinse temperature setting, never fear, most default to cold rinse.
- Transfer the caterpillar to the dryer and dry on the HOTTEST setting.
- At this point you can take a peek, but you may need to go ahead and repeat the washing and drying process to get your wool dryer balls fully felted. So if you don’t want to peek, just toss em in again.
- Pull those bad boys out of the pantyhose, make sure they’re felted together.
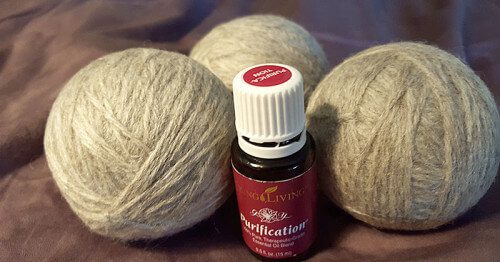
- Add a couple drops of your favorite essential oils. I buy mine here and usually use Purification blend. Place the wool dryer balls in your dryer with each load and you won’t need to add softener or dryer sheets. Win!
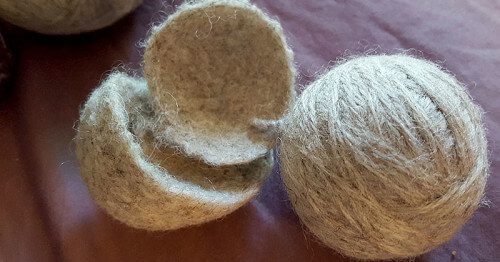
Didn’t I say it was like knitting that you can’t mess up? Well, I managed to mess up one of them. I’m just that awesome. But, hey, five of six is not bad. Here’s my OOPS shot just so you know I haven’t gotten too fancy on you.

DIY Wool Dryer Balls
Makes about 3 tennis ball size dryer balls
Ingredients
- Skein of yarn
- Old pantyhose
- Knitting needle or some sort of pokey thing (like a cuticle pusher)
Instructions
- Start at the end of a skein of 100% wool yarn. I prefer wool roving yarn, but as long as it's 100% wool, you're cool. They have Fisherman's Wool yarn in a lot of fabric shops and it's 100% wool, but it's pretty tightly wound, so it takes a little longer to create your ball. Works great, though!
- Place the end between your forefinger and middle finger. Pull your two fingers a bit apart and wrap the yarn loosely around 10 times.
- Pull that loop off your fingers while pinching in the middle to keep it together.
- Start spooling the yarn around that loop right next to your finger. Keep spooling it around, tightly now, and start shifting your direction to go around in a clockwise pattern to make a sphere.
- Once you've gotten the size you want (a little larger than a golfball is actually fine, but the larger variety---tennis or softball---will dry your clothes more quickly and efficiently), stop rolling and cut the yarn with an inch or so to spare.
- Use some sort of skinny implement like a knitting needle. (I used the little key tool for the interior doors of the house instead.) Shove the end of the yarn underneath a few layers of the dryer ball. Strangely, I also discovered a cuticle pusher works really well.
- Repeat until you have 3 (or 6 if you get yourself 2 skeins) dryer balls.
- Place the balls in the leg of an old pair of pantyhose. Use ACRYLIC yarn or some other string to tie the pantyhouse tightly next to the sides of each dryer ball. DO NOT USE THE WOOL YARN for the ties. It will felt to the pantyhose if you do.
- Plunk the whole caterpillar of dryer ball goodness into your washing machine on HOT WASH and COLD RINSE (if your dryer doesn't have a rinse temperature setting, never fear, most default to cold rinse.
- Transfer the caterpillar to the dryer and dry on the HOTTEST setting.
- At this point you can take a peek, but you may need to go ahead and repeat the washing and drying process to get your wool dryer balls fully felted. So if you don't want to peek, just toss em in again.
- Pull those bad boys out of the pantyhose, make sure they're felted together.
- Add a couple drops of your favorite essential oils. I buy mine here and usually use Purification blend. Place the wool dryer balls in your dryer with each load and you won't need to add softener or dryer sheets. Win!
Love it? Pin it, please!
